Today I want to dive into Fetch Priority and Largest Contentful Paint (LCP). LCP is a Core Web Vitals metric that measures the time it takes for the largest content element to become visible within the viewport. It is a good indicator of when the main content of the page is loaded and is used to measure the perceived loading speed of a page.
How can I find the LCP element in a page?
LCP can be an H1 tag, an image, a video, or any other element that is visible within the viewport. The LCP element is not always the same, and it can change depending on the page content and the viewport size.
To find the LCP element, we can use the DevTools. We can open the Performance tab and record a page load. Once the page load is complete, we can click on the LCP event and see the LCP element highlighted in the page.
The LCP element is an image. What can I do?
The most expensive and tricky LCP element is an image. Images are usually the largest elements on a page, and they can take a long time to load.
The browser need to do the following:
- Find the image details in the HTML
- Download the image
- Render and display the image
Because images are expensive to display, the browser waits until it really needs to display the image before it does the aforementioned steps.
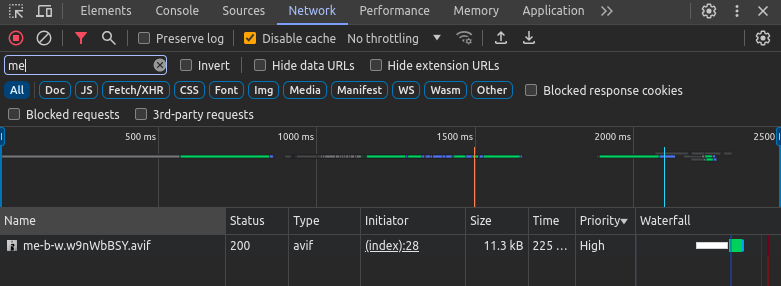
If you go to the browser network tab and you reload the page, you will probably see that the first image is set to high priority.

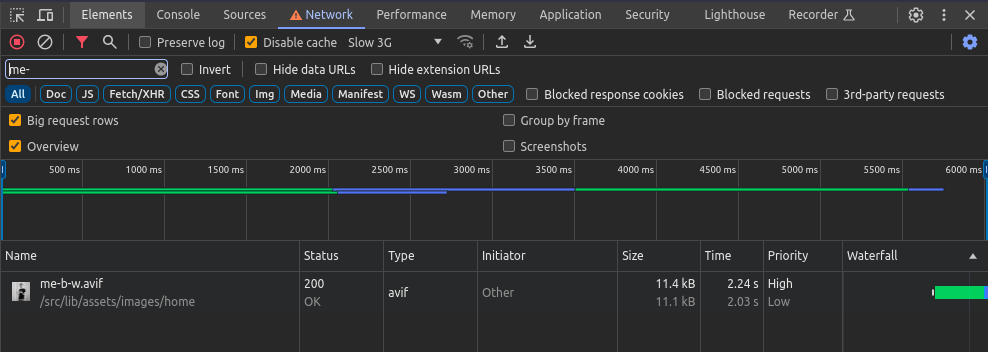
However, it you toggle to the Slow 3G network in the Throttling dropdown, you will see that, at first, the image is set in low priority. And after a few milliseconds, the priority is changed to high as the browser realizes that the image is in the viewport (if you can’t see this because it happens too fast, you can tick the Big request row checkbox).

How can I decide the priority of an element?
If not specified, the browser will decide the priority of an element based on the element type and the network conditions. However, we can also decide the priority of an element by using the priority attribute.
Usually, developing a site, we can have a good understanding of which is the LCP element and we can say to the browser to trust us and to set the priority to the element that we desire.
We can do it using the fetchpriority attribute in the following way:
<img src="image.jpg" fetchpriority="high" />

<link rel="preload" href="image.png" as="image" fetchpriority="high" />

<script src="script.js" async fetchpriority="high"></script>
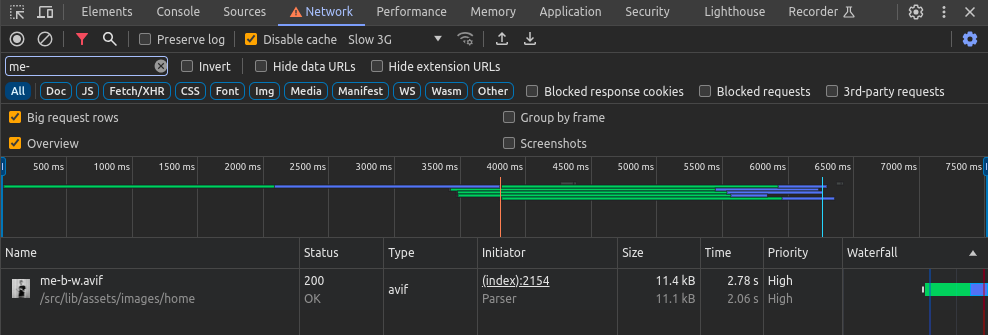
and the result would be the following:

If you decide to add the fetchpriority attribute to an element, make sure you do not have the loading attribute set to lazy. You don’t want it anyway if the image is the LCP element.
What is the different between fetchpriority and loading?
The two attributes do similar but different things.
The loading attribute (that could be set to lazy o eager) is about WHEN to fetch the resource. It tells the browser to not load the element at all, until it’s visible on the screen (actually, almost visible). It’s a great way to make the most of the user’s bandwidth and not to waste it loading elements that the user do not see on the screen.
The fetchpriority attribute (that could be set to high, low or auto) is about HOW to fetch the resource. It tells the browser how important is the resource when it starts to fetch it. This means that do not stop the browser to load the element during the busy period that is the first few milliseconds of the loading page.
So, you won’t have loading="lazy" and fetchpriority="high" together.
My rule of thumb is:
- If the element is the LCP element, use
fetchpriority="high" - If the element is not the LCP element, use
loading="lazy"
There is every a case where I should use fetchpriority="low"?
One example of when you would want to use fetchpriority="low" is when you have carousel of images. In this case, you want to load the first image as soon as possible, but you might not care when the other images are loaded. In this case, you can set the fetchpriority to low for the images that are not visible in the viewport.
<li><img src="image1.jpg" fetchpriority="high" /></li>
<li><img src="image2.jpg" fetchpriority="low" /></li>
<li><img src="image3.jpg" fetchpriority="low" /></li>
<li><img src="image4.jpg" fetchpriority="low" /></li>
Conclusion
Hopefully, this article helped you to understand how to use the fetchpriority attribute to improve the user experience. However, it’s important to be aware that usually the browser does a good job at deciding the priority of an element, so you should use the fetchpriority attribute only when you’re not 100% happy with the browser’s decision.
I usually use it if I have multiple images on the screen, one way larger than the others, and I want to make sure that the browser loads the large image first.
I also usually use it with images. I mentioned before that it can also be used with script and link elements, but you really need to have a specific use case to use it with those elements.
Until the next time, keep on coding!